Cube Cardboard Lamp |
Upcycling + Design = Cube Cardboard Lamp! If you care about any of those 2 things, then you should definitely make this lamp. It's completely made out of cardboard. What makes it special is the fact that it takes advantage of the corrugated cardboard. The light comes out of its structure and gives a whole new light effect. It takes some time and patience, but the result is definitely worth everything! So, what are you waiting for? Don't throw away your cardboard and make your own green lamp today! |
Materials and Tools:
- corrugated cardboard
- hot glue/white glue
- a piece of velcro
- a piece of fabric
- cutter
- ruler
- pencil
- light bulb* and bulb holder
Step 1
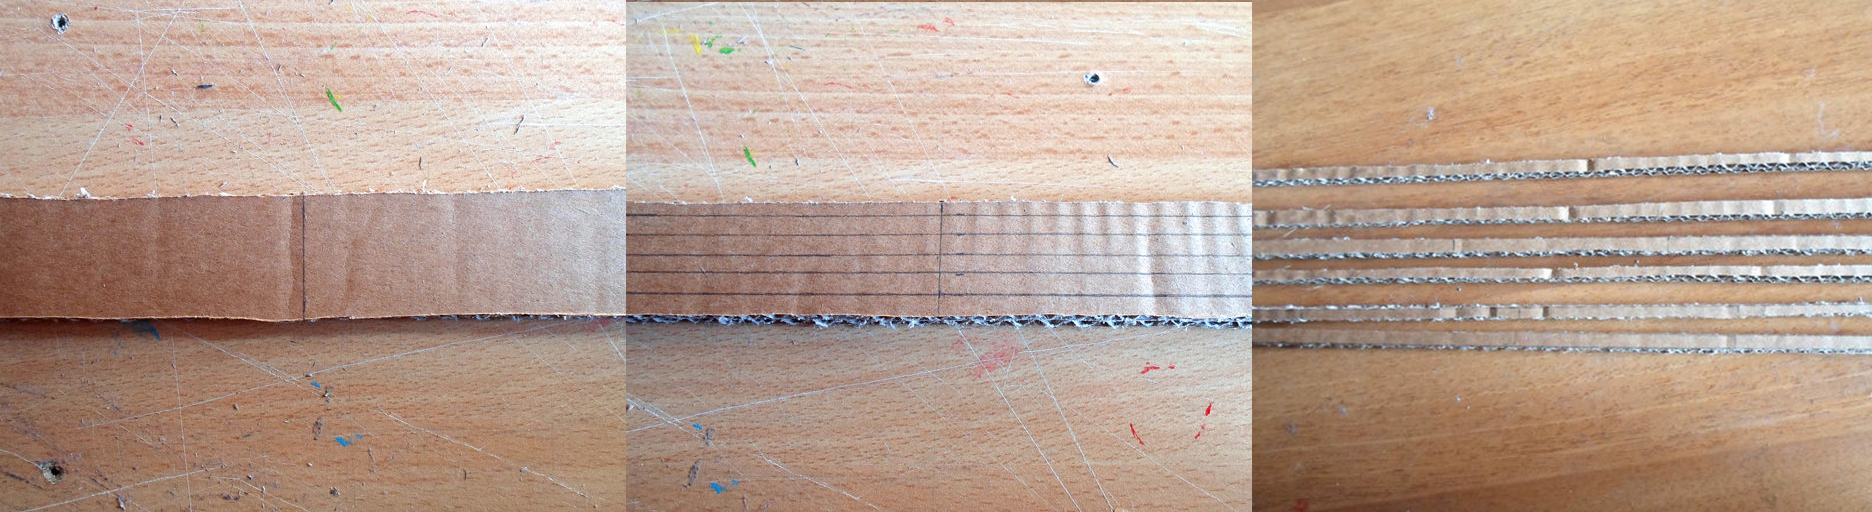
Step 1On a piece of cardboard, draw many thin strips and cut them. They need to be 5 x 80mm (0.19 x 3.14 inches).
You will need MANY of these strips, I don't know the exact number, but don't worry if you realize that you miss some while you are composing the lamp, you are always in time to make more. 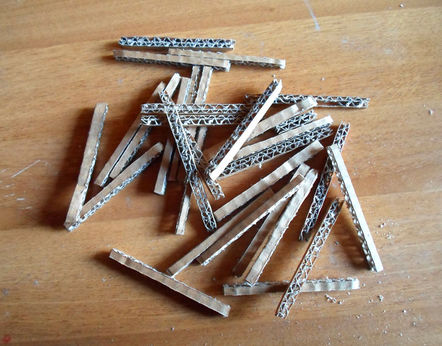
|
|

Step 4
|
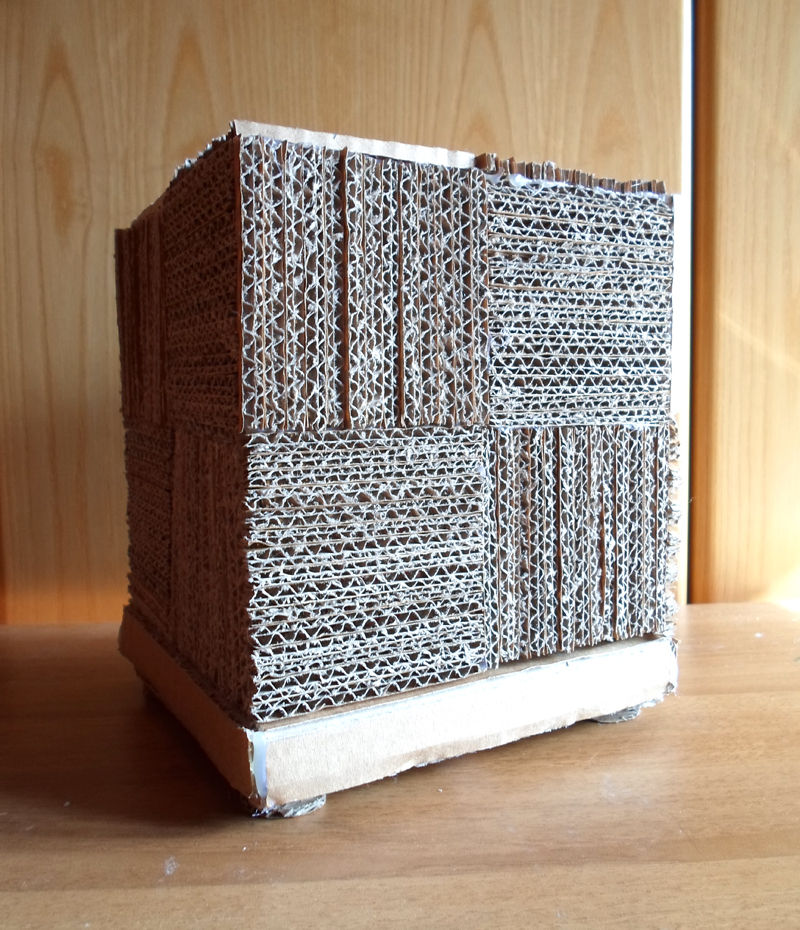
Now that all of the big squares are done, take 2 of them and glue their 2 sides together in a L shape.
Glue another square opposite to the other creating another right angle, and finally close the 4 sides of the cube with the forth square. To make sure that you obtain a perfect cube, you must follow the same pattern you started with. Take a look at the photos to fully understand how the pieces should be glued. Finally, glue the last square on top of the cube, to close it. You can use hot glue to do all this. |
Step 4
|

Step 5
Step 5On a new piece of cardboard draw and cut the scheme you see on picture A above:
the 2 big squares are 17x17cm (6.69 x 6.69 inches). The 4 smaller squares at the angles are 2x2cm (0.78 x 0.78 inches). The thin rectangles around the square are 2x17cm (0.78 x 6.69 inches). The overall length is 38cm (14.96 inches). Now, following picture B, bend the cardboard where the green lines are and make a cut on the red ones. As you bend and cut these parts, your little box will start to form. This box will be the base of your lamp. Glue the little squares on the inside faces of the rectangles to keep everything in shape. The box is done. The lines and crosses you see on the photos of my piece of cardboard are made to cover my mistakes. Later I realized that I didn't need those extra pieces so I cut them out. DON'T make them! |

Step 5
|
Step 6
Step 6Cut a 8x2cm (3.14 x 0.78 inches) strip out of fabric and glue its tip on the inside of the box side, as you can see on the photos.
Now glue one of the sides of velcro on the other tip of fabric, and the other side on the cover of the box. This way you'll be able to open and close the box when the glue has dried. I used hot glue. Cut 4 discs out of cardboard. They need to have a diameter of about 2cm (0.78 inches). Now, keeping in mind that the cover of the box is the bottom, glue the cardboard discs on the 4 angles of the cover. These are the feet of the lamp. 
Step 6
|

Step 7
Step 7Draw the outline of the bulb holder on top of the box and cut the circle out.
Insert the bulb holder in the hole you have just made and make a smaller hole on the side of the box so that the cables can pass through it. 
Step 7
|
|
|
|
