Polymer Clay Covered Flatware |
Polymer clay is an amazing material to work with. It allows you to create new objects or renew old ones. In this project, I tried a very particular technique that gives unique effects, and I used it to cover flatware's handles. I had some clay left so I also covered a key. This was my first polymer clay project ever and I am very satisfied with the result. The technique may look complicated and long to do, but I'm sure that if you carefully follow each step everybody can make it! I am the proof. |
Materials and Tools:
- 3 colors of polymer clay - I used white, blue and red
- pasta machine or clay conditioning machine
- cutter
- ruler
- oven
- flatware, or whatever you want to cover
Step 1
Step 1Take a piece of white clay and a piece of red clay. Their sizes must be as similar as possible.
Pass both of them through the pasta machine, starting from the thickest level to a thinner one. The 2 pieces need to be about 1,5mm (0.05 inches) thick. Cut them into identical rectangles. 
Step 1
|

Step 2
Step 2Divide both rectangles in 2 triangles, cutting their diagonal.
Overlap each color's triangles to create 2 thicker triangles: a white one and a red one. Now join the longest side of the 2 triangles together, to compose a bicolor rectangle. Try to make them stick to each other without changing their shape. 
Step 2
|
Step 3
|
Use the pasta machine to flatten the bicolor rectangle.
Fold it in half then pass it through the machine again. Keep folding and flattening the rectangle until the 2 colors are mixed enough to create a shade that goes from red to white. |
Step 3
|
Step 4
Step 4Make a roll with your clay rectangle, making sure to start from the white side to the red one.
Using a cutter, make a cut that goes from the circumference of the roll to its white middle. Now make other 2 cuts that start from that same cut and end respectively on the right and on the left, to form something like an M shaped cut (see photos). 
Step 4
|

Step 5
Step 5Pass a little piece of blue clay through the pasta machine until it's as thin as the ones you did before.
Make 3 strips that are as long as the red clay roll and about as large as the cuts you made in the roll. Now enlarge the cuts a little and insert each of those blue strips in them. Close and press the roll giving it a "drop" shape. 
Step 5
|
Step 6
Step 6Using 2 small pieces of blue clay, create 2 long and thin snakes, about as big as 1/3 of the roll. Make those snakes as long as the roll and give them a triangular shape pressing them with your fingers.
Place the red roll between the blue snakes and press them together to create a thick triangular snake. It has to become like a long pyramid. Now, always using your fingers, gently pull the clay to make it longer and about 1cm thick (0.39 inches). Make sure to keep the pyramid shape. Divide it in 6 equal pieces with the help of a ruler.
Step 6
|

Step 7
Step 7Place 3 pieces next to each other to create a semicircle and press them a little to make sure that they stick to each other. Do the same with the other 3 pieces.
Create a very thin snake with white clay. It has to be about 2mm (0.07 inches) thick and as long as the other pieces. Lay it in the middle of the first semicircle and add the second semicircle on top. Press all the pieces to stick them together. The white snake in the middle will be the center of the flower. 
Step 7
|
Step 8
|
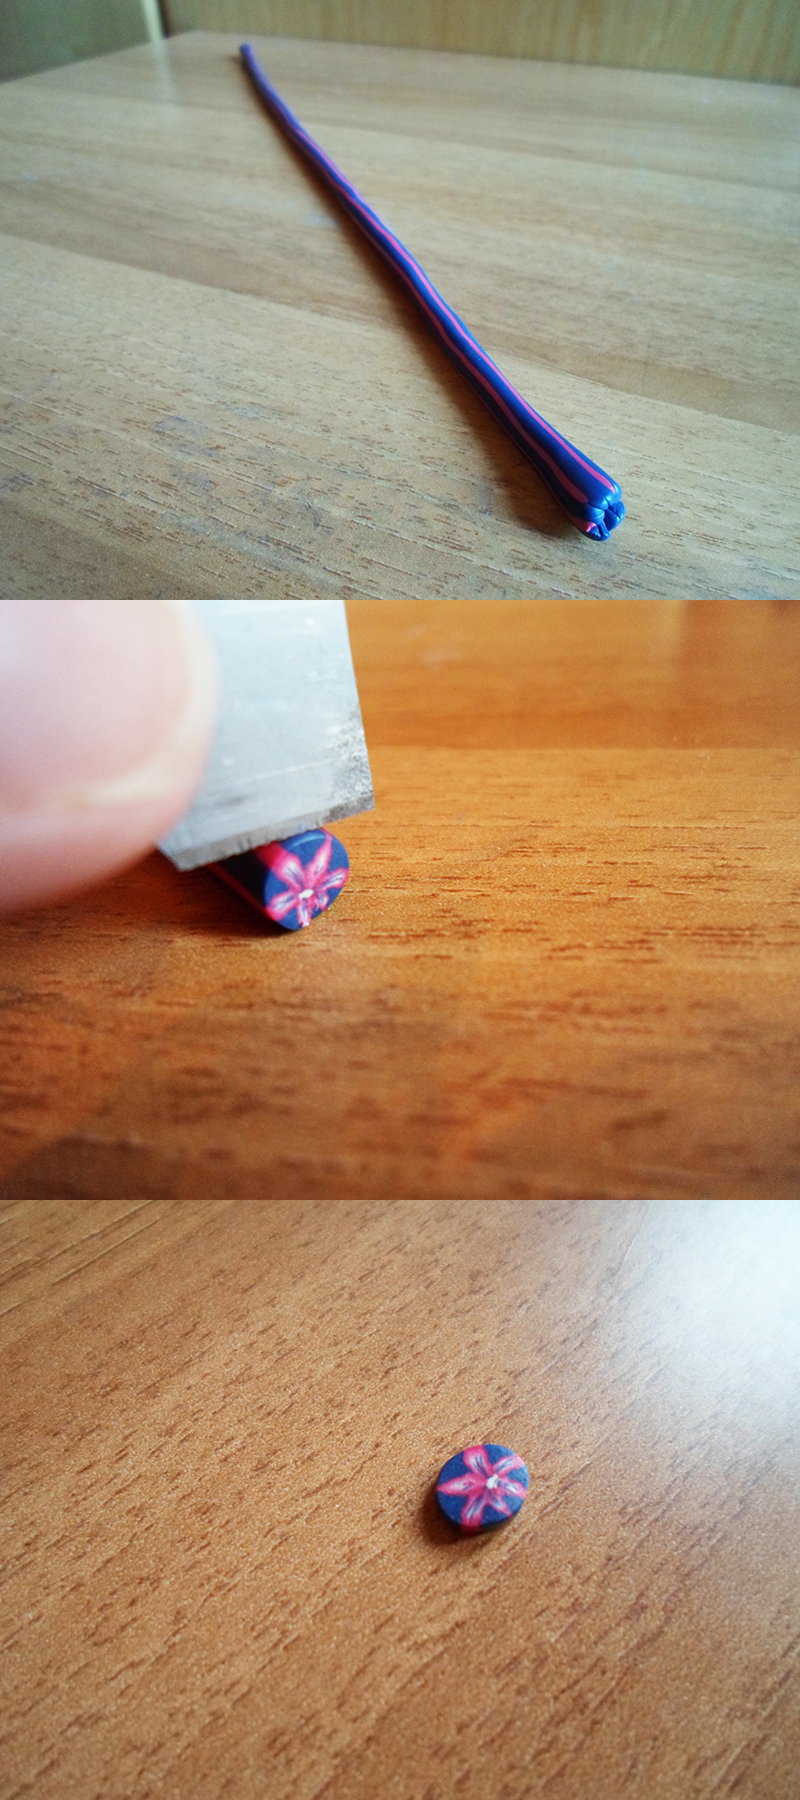
Pull your new piece of clay and make it as long as possible. Ok, not TOO long!
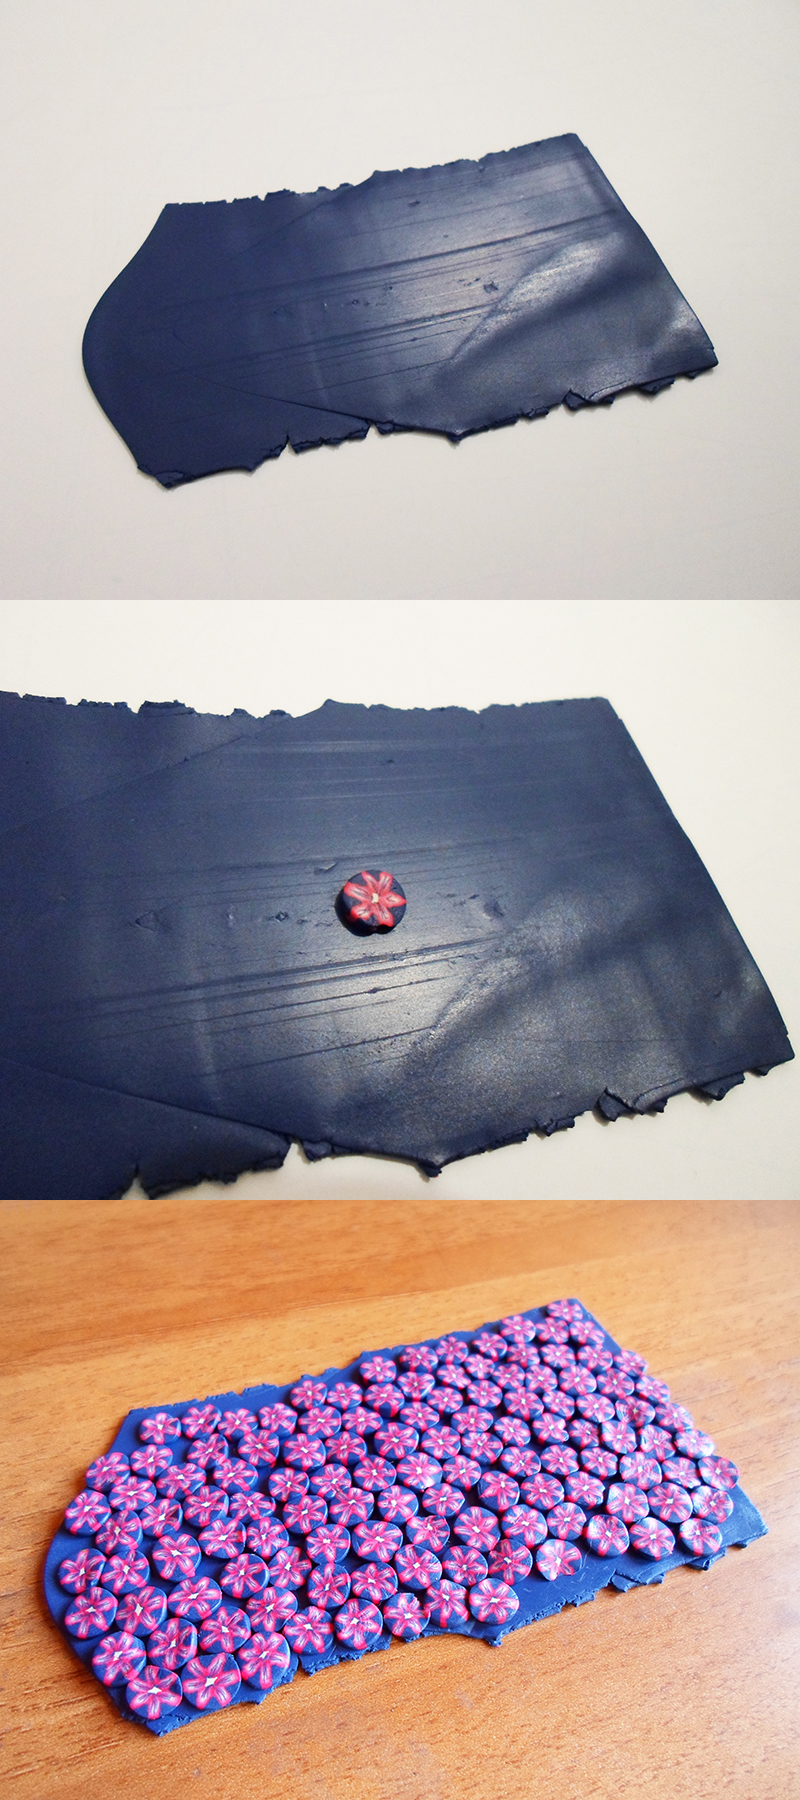
Make it about 5mm thick (0.19 inches). Take a cutter and cut out the 2 ends of the snake. Now you can finally see the small flower in it. Use the cutter to cut many thin slices of clay snake. You will obtain many little flowers this way.Make a thin rectangle using blue clay, just like you did in the first step, and stick all the flowers you can on its surface. IMPORTANT: rotate the clay cylinder with the cutter as you slice it. The flowers will turn out round this way. If you just press the clay while cutting it, you will also press the flower and ruin its shape. |
Step 8
|
Step 9
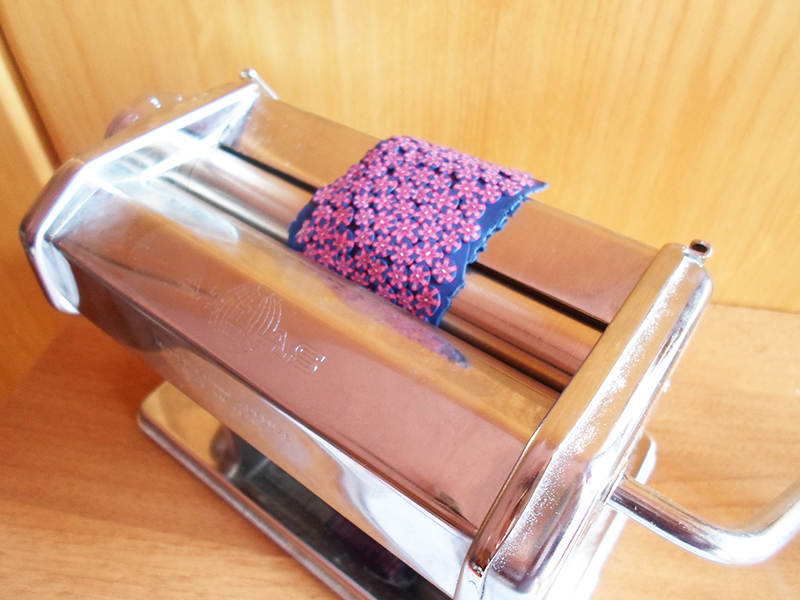
Step 9Pass the rectangle full of flowers through the pasta machine to flatten it and make it bigger. DON'T fold the clay this time!
Make sure to start from the thickest level and slowly go to the thinner ones. Your flowers would stretch too much otherwise. 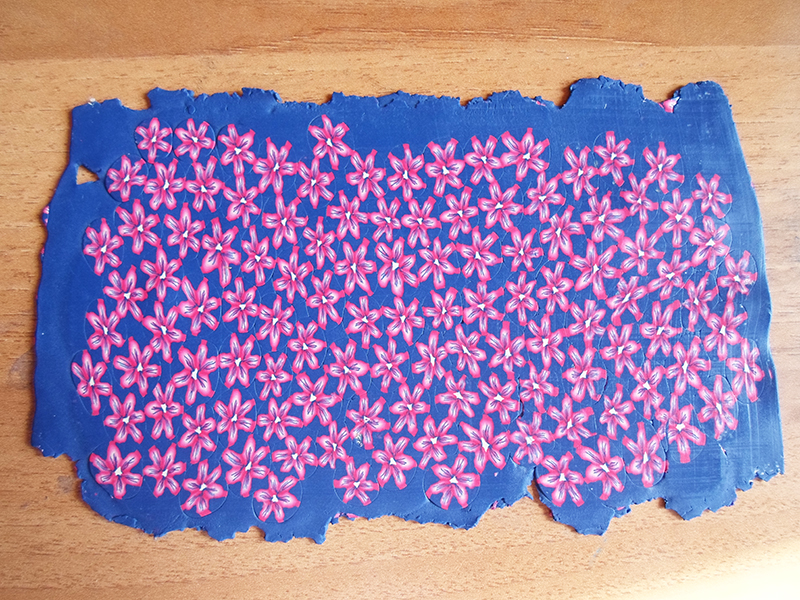
Step 9
|
Step 10
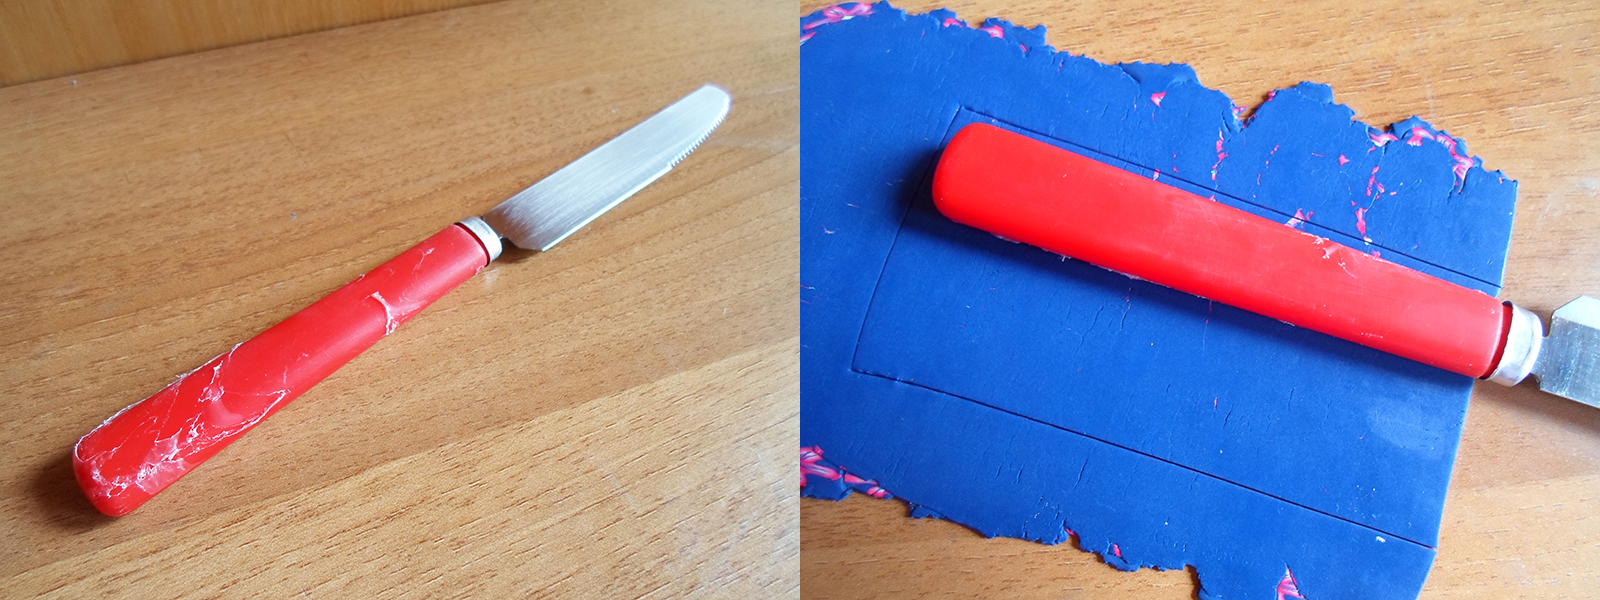
Step 10It's time to use the flowered clay to cover your piece of flatware now. I covered an old knife.
Lay your clay rectangle on a table with the flowers facing the table. Place your knife's (or whatever) handle on the clay and cut the shape you need to cover it all. To do this you simply have to rotate the handle on the clay to understand the amount you need. Remove the exceeding clay. You can use it to cover something else. Cover your handle with the piece of clay you cut and press it with your fingers to make sure that it sticks to the handle. Also smooth the part where the sides of the clay meet with your finger. You'll remove the separation this way and make it less visible. 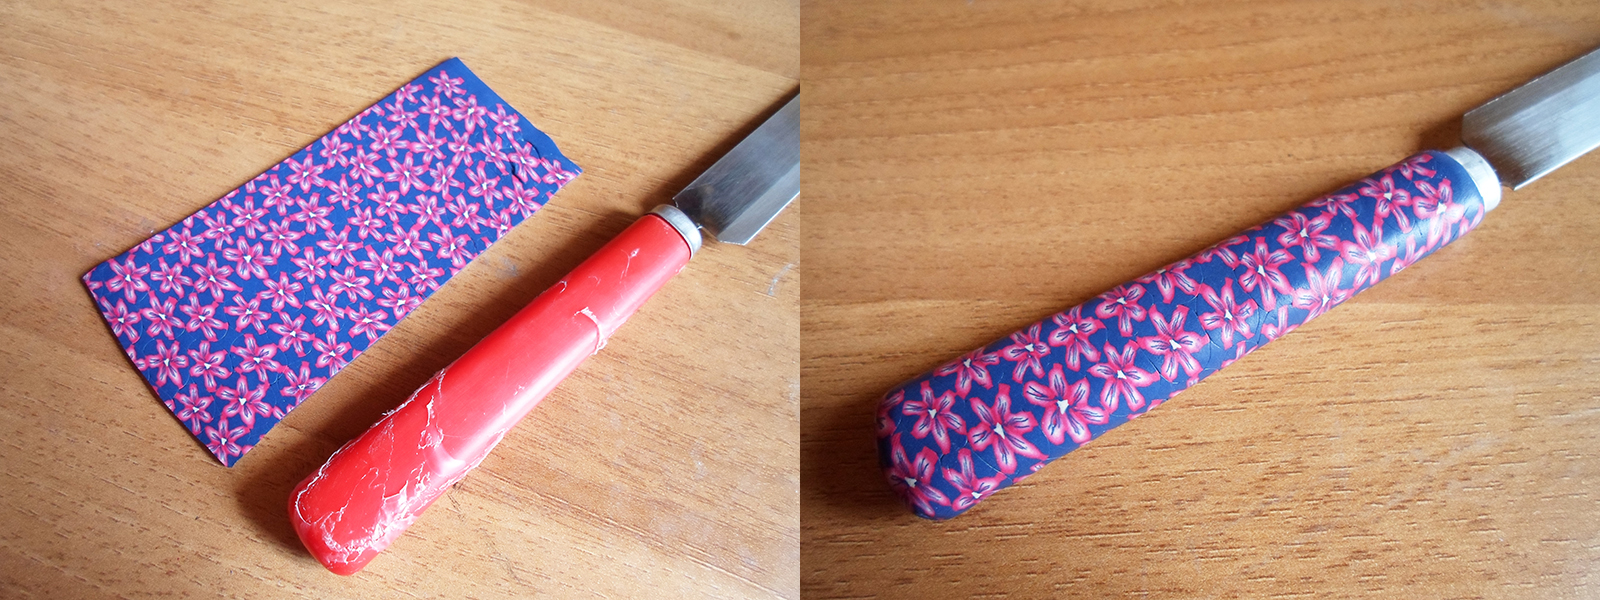
Step 10
|
Step 11
|
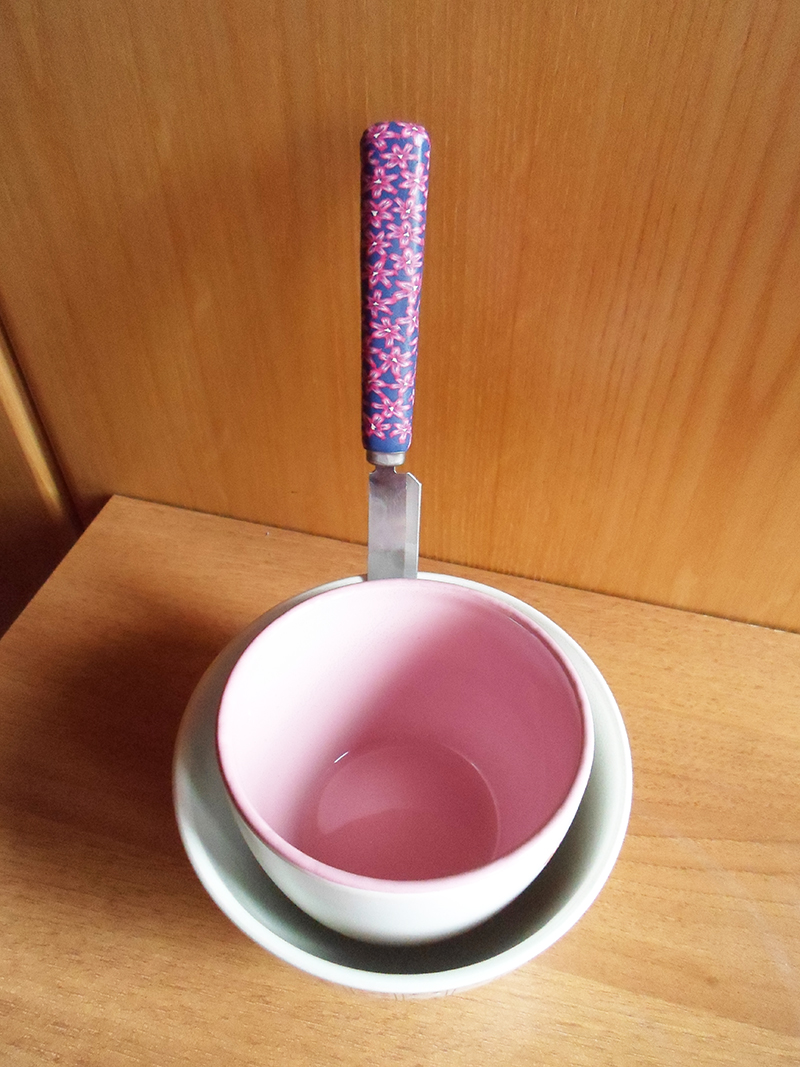
Step 11You need to bake your clay handle now.
But before doing that, you must place your flatware in a way that the clay handle doesn't touch any surface. The solution I found is to put the free side of the knife between 2 bowls, one bigger than the other. You can see it in the photo. When you have finally found the right way to keep the handle up, put it in the oven and bake at 110/120°C - 230F for 15 minutes. This also depends on your own clay so make sure to read the instructions on it first. Finally take it out of the oven and let it cool. |

You can finally admire and use your brand new flatware now!
REMEMBER: these are not dishwasher safe, but you can regularly wash them in water. |
