Quilled Snowflake Decorations |
These snowflake decorations are completely made out of paper. The quilling technique offers a huge number of possibilities to create many different shapes. I am going to show you how to create quilled snowflakes that are very easy to do. Even children can work on this project! This is a perfect decoration for the winter time, but you could also use it for a Christmas card or however you want it. Let your creativity wander and have a great quilling time! |
Materials and Tools:
- 1 sheet of A4 white paper
- slotted quilling tool
- white glue
- paint brush
- scissors or cutter
- pencil
- ruler
Step 1
Step 1Take your sheet of paper and divide it in many strips on the longest side. Choose a size for them because they must be identical. I made them 0,5cm (0.19 inches) thick.
Cut all of your strips using scissors or a cutter. The cutter works much faster than scissors if you use a ruler with it. 
Step 1
|

Step 2
Step 2Insert the tip of your first strip of paper in the slotted tool and start to roll it until you reach the other end of the strip.
Remove the coil from the tool and secure it with glue keeping it tight. This type of coil is called "tight coil". 
Step 2
|
Step 3
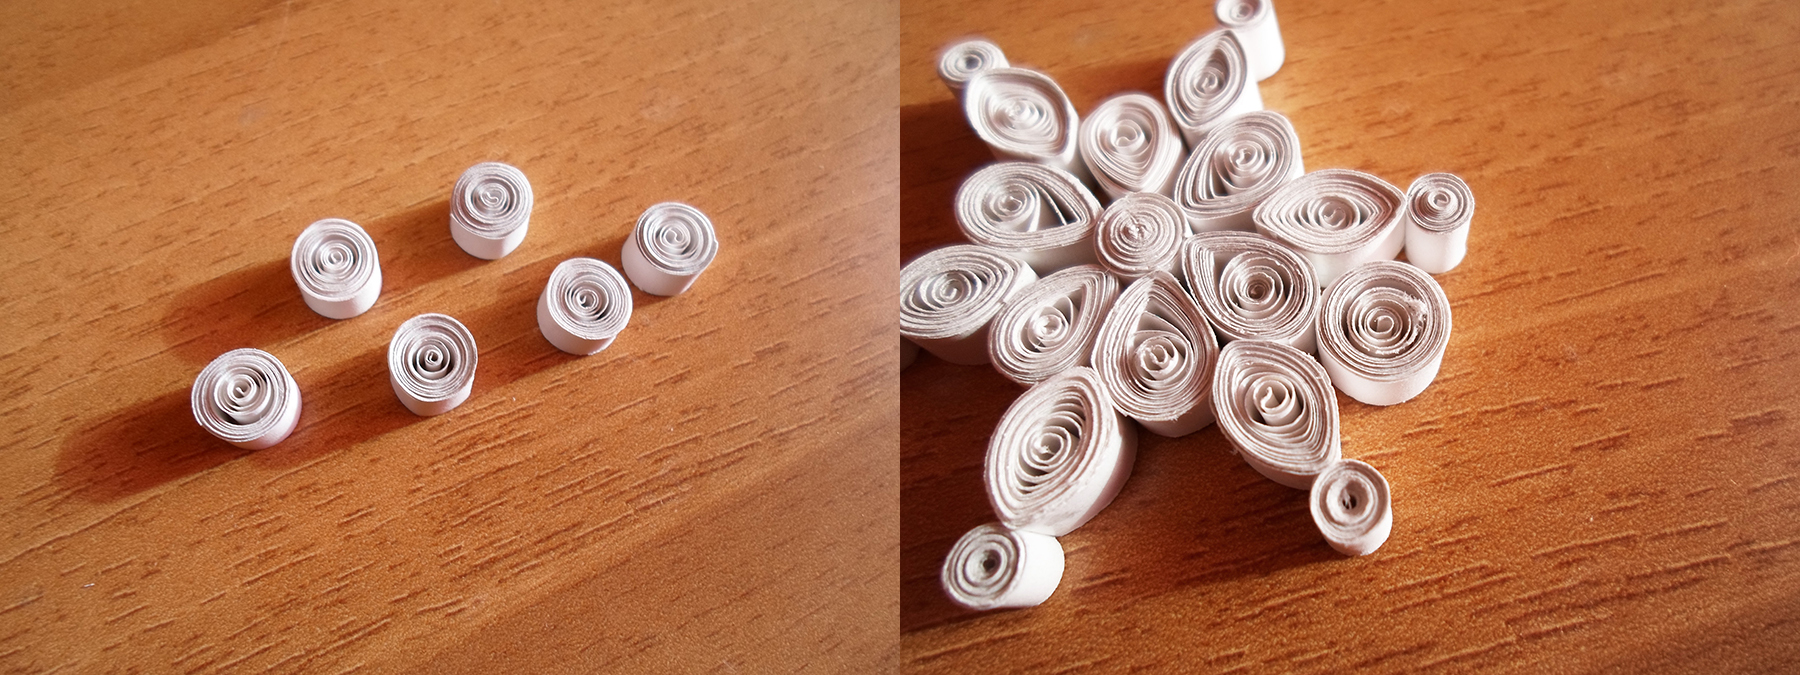
Step 3You need to make 6 of what are called "loose coils" now.
Loose coils are rolled just like the tight ones. The only difference is that you need to release the coil a little from your fingers before securing it with glue. This way it will be bigger but not tight anymore. Now press the coils with your fingers once to create a teardrop shape. Glue the tip of each of those teardrop coils all around the tight coil you made in Step 2. 
Step 3
|

Step 4
|
Make 6 eye shaped coils.
The eye coils are made starting with a loose coil. Then, instead of pressing it just once to create a teardrop, press it twice on 2 opposite sides to create a shape that reminds of an eye. Glue these eye coils between each of the teardrop coils you made previously. |

Step 5
|
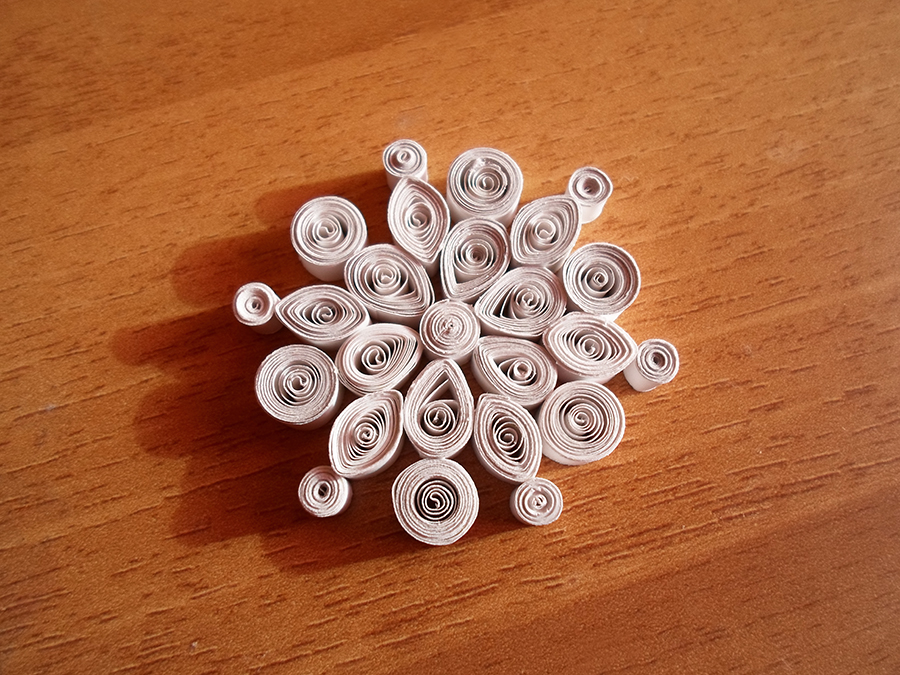
Step 5Divide 3 strips in half and cut them to obtain 6 shorter strips.
Make 6 tight coils with them, always using the slotted tool. Glue each of those tight coils on the tip of the eye coils. This is already a very nice shape so you can end the work here and go to Step 8. Keep reading the next steps if you want to make a bigger snowflake. |

Step 5
|
Step 6
Step 6Create 6 regular loose coils now and glue them on the teardrop coils, between the eye and tight coils.
Step 6
|

Step 7
Step 7Make other 6 loose coils. Now you need to press each of them with your fingers to create a square shape. It's almost like creating an eye coil, but you need to press on 4 sides instead.
Glue a tip of each square coil on your snowflake's loose coils you created on Step 6. 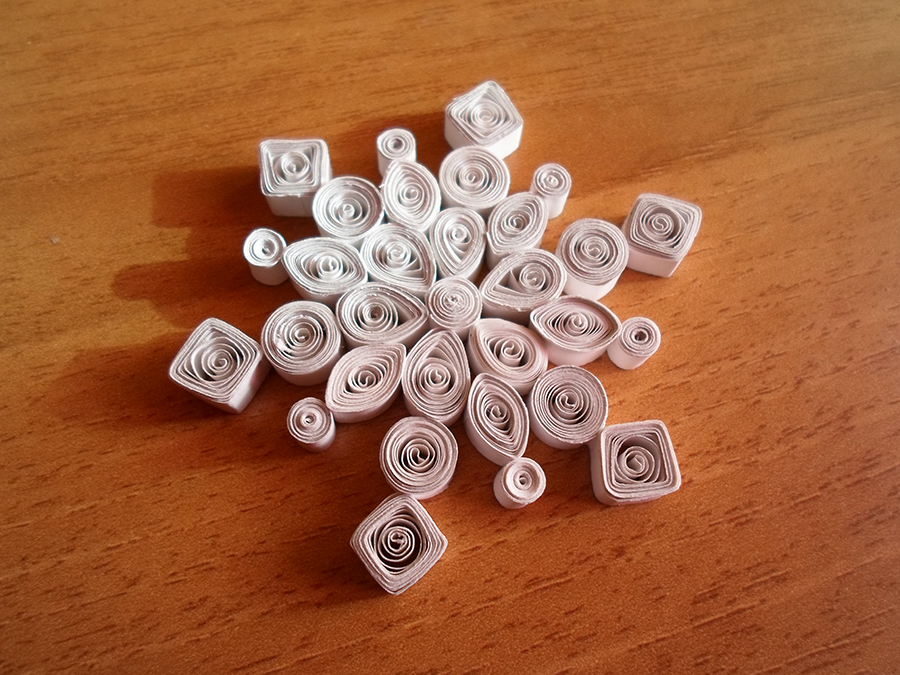
Step 7
|
Step 8
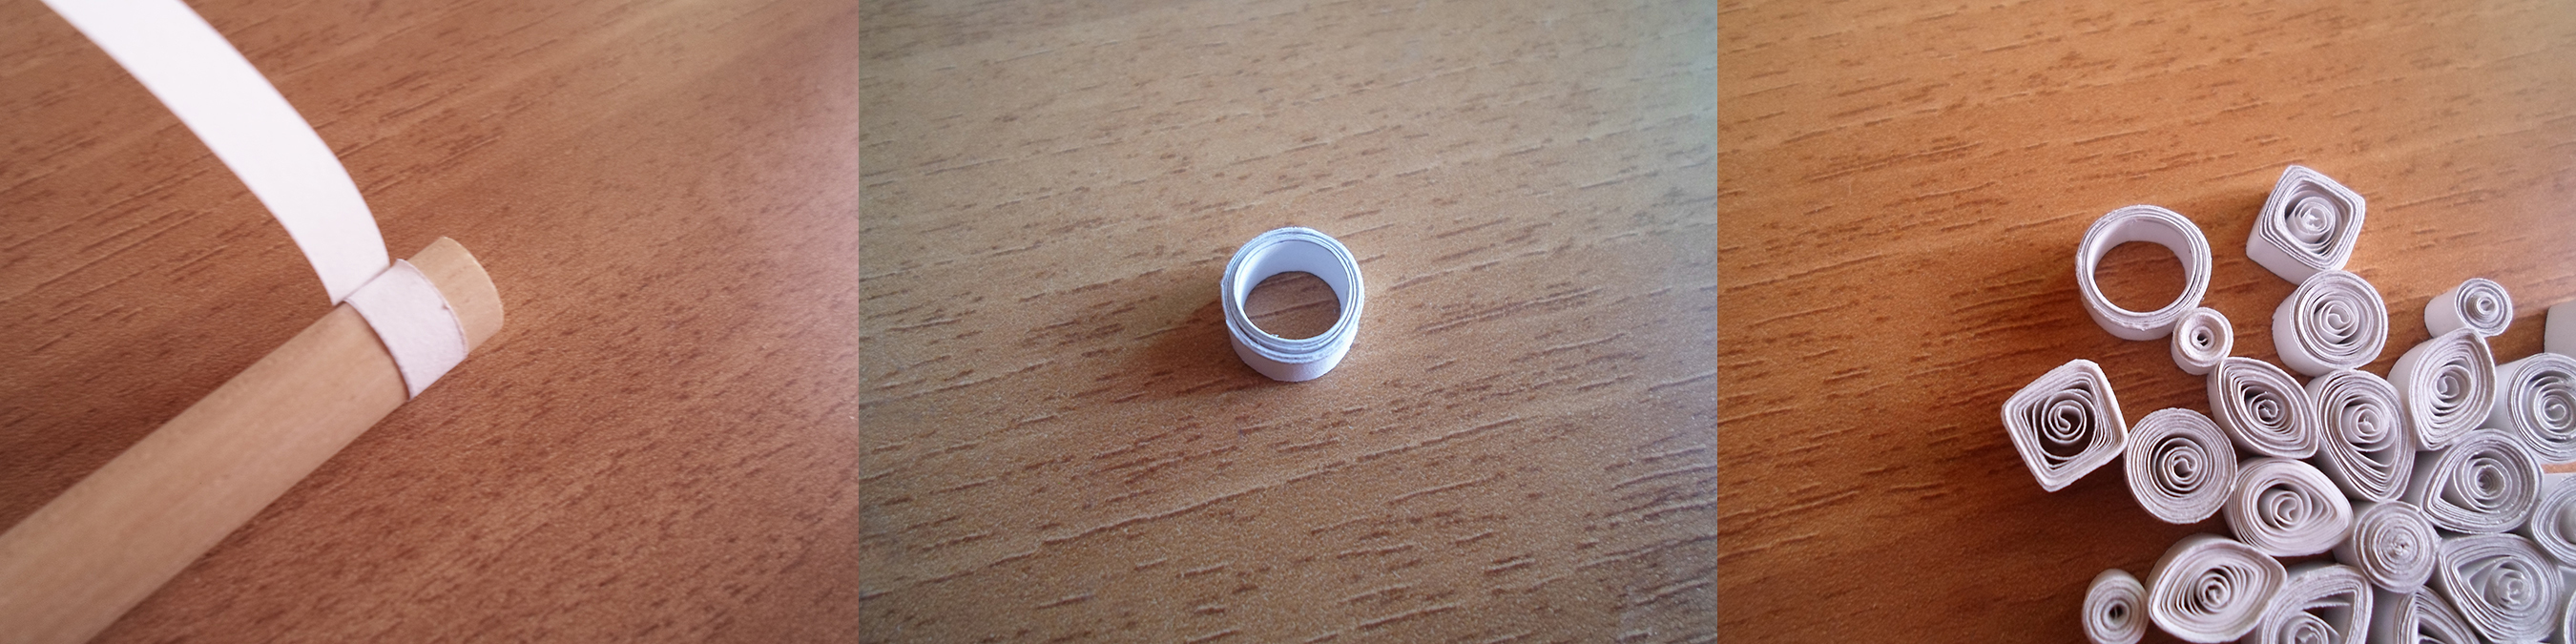
Step 8The snowflake is over, but you still need something that will hold the lace to be able to hang it.
To do this, roll a strip of paper around a cylinder tool. You can use a pen, a pencil, or whatever you prefer. I used the handle of my slotted tool to do it. Make sure to put some glue after the first round, then keep rolling the strip until you reach the other end. Secure it with some other glue. Finally, glue this new coil on top of one of the small tight coils and let it dry. Insert a lace in the last coil and hang it.
Your snowflake is done! 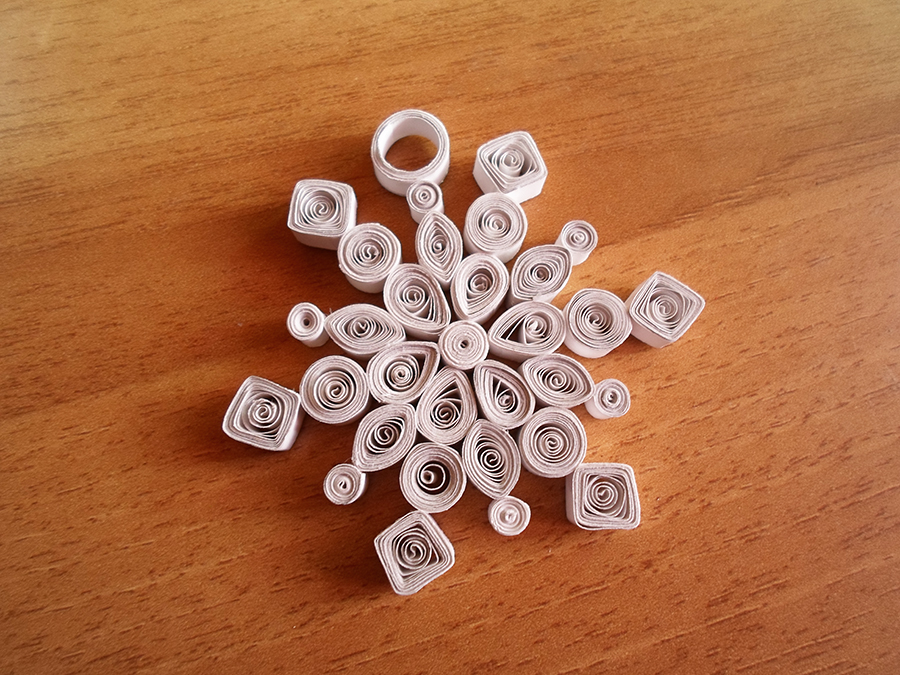
Step 8
|
